
Worksite lifting rarely fails because someone forgot the crane.
It fails because “the small bits” weren’t specified, checked, or matched to the lift plan.
If procurement is picking from a catalogue and the crew is figuring it out at the hook, the job is already carrying avoidable risk, especially when the lifting accessory range for worksites hasn’t been standardised.
Lifting accessories are the connection layer between a planned lift and a real load, and that layer is where most mismatches hide.
Why “close enough” fails in lifting accessories
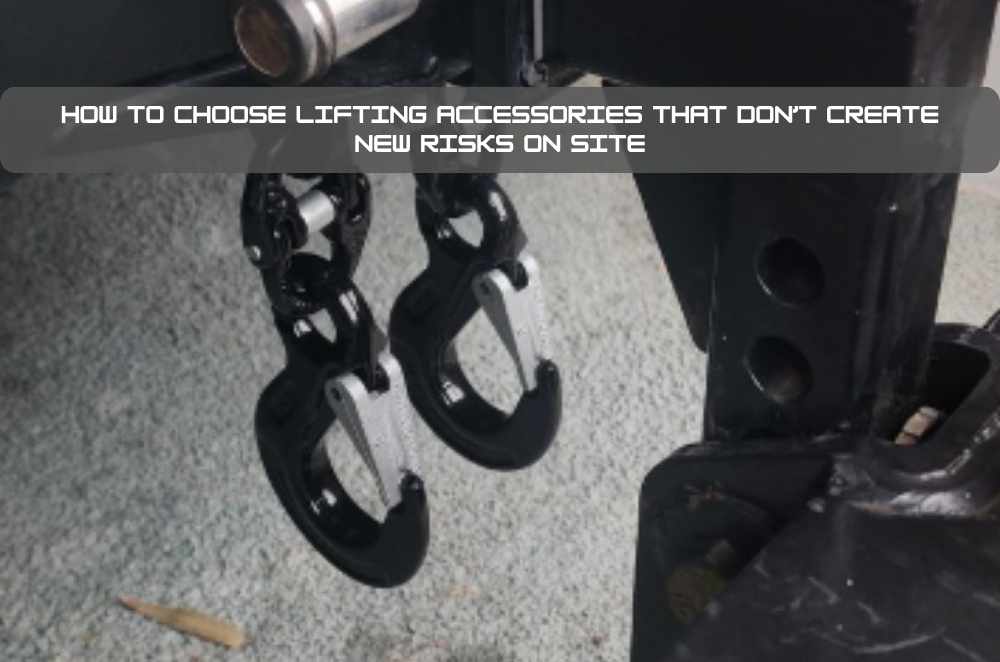
A lifting system is only as strong as its weakest connection point, and the connection point is often a shackle, hook, master link, lifting point, or adaptor rather than the main lifting machine.
Even when each component is individually rated, the combination can be wrong: pin diameter doesn’t fit, the angle changes the effective capacity, the load doesn’t sit correctly, or the connection introduces side-loading.
What makes this tricky on worksites is speed. A job that’s meant to be routine can become a scramble when the right connector isn’t available, and “we’ll make it work” becomes the default.
The safest teams treat accessories like critical spares: standardised, pre-checked, and easy to select without guesswork.
The four checks that prevent most mismatches
1) Connection geometry and fit
Start with what physically connects to what: pin size, bow width, hook throat, sling eye size, lifting point thread, and any required clearance around the load.
A common mistake is selecting by WLL alone and discovering at the last moment that the shackle pin won’t pass through the lifting lug, or the sling eye crowds the hook and won’t sit correctly.
First action: list the top 10 “real” connection points used on site (common lugs, lifting eyes, spreader beams, forklift jib hooks, plate clamps) and record the key dimensions that drive compatibility.
2) Load path and side-loading risk
Accessories are typically rated for loading in a specific direction.
Side-loading a shackle, twisting a sling leg, or pulling off-axis from a lifting point can reduce practical capacity and introduce failure modes that aren’t obvious to a busy crew.
This is where lift planning and accessory selection must talk to each other: the rigging layout determines angles, and angles determine what the accessories actually experience.
First action: add a “load direction check” line to pre-lift checks: Is any connector likely to be pulled sideways or across an edge?
3) Rated capacity in the actual configuration
Capacity isn’t just the number stamped on the component.
The configuration matters: sling angle, sling type, basket vs choke, multi-leg bridle arrangement, use of shortening clutches, and any deration required by the site procedure or manufacturer guidance.
You don’t need to turn the crew into engineers, but you do need a repeatable method: a lift plan that calls out the configuration and a selection process that matches it.
First action: standardise three “approved” rigging patterns for common lifts on the site and build accessory kits around those patterns.
4) Inspection status and traceability
If lifting accessories can’t be quickly verified as current, the site will either delay the job or take shortcuts.
Tags, inspection records, and quarantine processes are the unglamorous systems that keep the right gear in circulation and the questionable gear out.
In practice, this means making it easy to do the right thing: clear tagging, obvious quarantine location, and a simple rule for what to do when anything looks off.
First action: run a 30-minute “gear walk” in the laydown area and flag anything untagged, illegible, damaged, or stored in a way that invites wear.
Common mistakes that look minor until they aren’t
Assuming accessories are interchangeable because they “look the same” is the fastest route to incompatibility.
Buying to a single line item like “shackles” without specifying size, pin type, grade, and intended use leads to a mixed bin that no one trusts.
Letting the last-minute “make it fit” decision happen at height (or over a live area) increases exposure time and compresses the time available for proper checks.
Using one accessory to solve two problems, like substituting a connector to “fix” an angle issue, often creates a new failure risk (side-loading, point loading, or crowding).
Storing accessories loose in a way that causes wear, thread damage, or missing pins quietly degrades readiness long before the next lift.
Decision factors when choosing accessories and suppliers
Standardisation beats variety
A worksite does better with a smaller set of known, compatible options than a bigger set of “maybe” options. Standardisation means the lift plan language matches what’s in the crib, the crew recognises what’s acceptable, and procurement can order consistently.
A useful exercise is to map accessories to the site’s most common lift types: plant positioning, palletised loads, steel members, formwork, or shutdown components. Then build a “site range” that covers those use cases with minimal overlap.
Compatibility documentation and selection speed
The best accessory range is the one the team can select quickly and correctly when pressure is on. That usually means clear categories, consistent sizing, and documentation that helps translate a lift plan into a purchase spec or kit list.
If the site is standardising purchase specs, it helps to map accessory categories and typical connection points in one place, then use that map to build a repeatable ordering spec and kit list.
Quality signals that matter on site
Rather than chasing “premium” labels, focus on signals that improve day-to-day reliability: clear markings, consistent supply, availability of matching components, and packaging/storage that reduces damage.
Also consider how the supplier supports the operational reality: can you get the same spec again, can you avoid near-miss substitutions, and can the range be kept consistent across crews and projects?
Trade-offs to be honest about
A narrow standard range can leave gaps for unusual lifts, so keep a controlled pathway for exceptions (approved alternatives, engineered lifts, or specialist sourcing).
A wide range can cover more scenarios, but it increases selection errors unless labelling, training, and kitting are strong.
Operator Experience Moment: I’ve seen sites where the lift plan was solid but the job stalled because the right connector wasn’t on hand, and the crew started trial-and-error swapping gear to “get the lift done.” In those moments, people aren’t reckless, just rushed. The fix wasn’t more lectures; it was a tighter accessory range, clearer bins, and a simple compatibility list that matched how the team actually works.
A simple 7–14 day plan to tighten up site readiness
Day 1–2: Identify the top five recurring lifts and list the real connection points and typical rigging patterns.
Day 3–4: Audit the current accessory bins for duplicates, odd sizes, missing pins, unreadable tags, and anything that doesn’t match the site’s common lift patterns.
Day 5–7: Define a standard “core kit” per lift pattern (what must always be available) and create a clear ordering spec for each item, including sizes and intended use.
Day 8–10: Re-bin and label by function and size, separate quarantined gear, and set a single rule for what happens when a component can’t be verified.
Day 11–14: Run a short toolbox session using real site examples, then do a spot check during a live lift to confirm the selection process is being followed.
Local SMB mini-walkthrough
A Sydney fabrication shop wins a new install job and needs lifts at the workshop and at a client site.
They list their usual loads: motors, frames, and bundled steel, then note the connection points used most often.
They standardise a short set of shackles, slings, and connectors that match those points and keep a small exception pathway for odd jobs.
They label the rigging area by size and use, so a new supervisor can pick correctly without “tribal knowledge.”
They add a quick pre-lift check for side-loading and sling angles, because those were their recurring near-miss themes.
They set a fortnightly “gear walk” so inspection tags and storage stay under control.
Practical Opinions: Standardise first, then expand only when real lifts demand it.
Practical Opinions: If it’s hard to verify, it’s hard to use safely, make inspection status obvious.
Practical Opinions: Design the system for a rushed morning, not a quiet training room.
Key Takeaways
Most lifting accessory issues come from mismatched connections, not from the main lifting machine.
Standardising a core range reduces selection errors and speeds up lift preparation.
Always check fit, load direction, configuration capacity, and inspection status as a set.
A 7–14 day tidy-up of bins, specs, and labels can materially reduce last-minute improvisation.
Common questions we get from Aussie business owners
Q1) Do we need to standardise a single accessory range across every job?
Usually… a single “core range” is enough for most lifts, with a controlled pathway for exceptions. Next step: identify the top five lift types and build a short core kit around them before adding anything else. Local note: across Sydney sites with mixed subcontractors, a consistent core range helps reduce miscommunication when teams rotate.
Q2) How do we reduce the risk of selecting the wrong shackle or connector?
In most cases… the risk drops when selection is driven by a simple compatibility checklist (dimensions, direction of loading, and configuration) rather than by WLL alone. Next step: record the common lug/eye dimensions on site and label bins by size and use so the right match is obvious. Local note: if you’re moving between workshop lifts and client-site lifts around NSW, keep the same labelling logic in both locations.
Q3) What’s the most practical inspection approach for a small team?
It depends… on how often the gear is used and how many people touch it, but the workable approach is the one that makes quarantining easy. Next step: nominate a quarantine spot, agree on a single “if unsure, tag out” rule, and do a short, scheduled gear walk every fortnight. Local note: for SMEs juggling multiple jobs across the metro area, short routine checks beat big annual clean-ups that never quite happen.
Q4) When should we bring in a competent person rather than “figuring it out” internally?
Usually… if the lift is non-routine, involves unusual angles or connection points, requires exceptions to your standard kit, or has higher consequence if something goes wrong, it’s time to escalate. Next step: create a trigger list (non-standard load, unknown lifting points, tight clearances, public interface) that requires sign-off before the lift proceeds. Local note: on busier Sydney commercial sites, these trigger lists also help align with site procedures and SWMS expectations.


Write a comment ...